
Instead of sending camera photos to your tablet one at a time, connect a card reader, copy the files into a local folder, and verify them before clearing the card. This 2026 workflow covers iPad and Android tablets, with a separate path for adding pictures to your photo library.
- Choose a card reader for tablet photos by connector, card format, and confirmed tablet compatibility.
- Thestoretosee favors practical tablet accessory choices: match the connection before comparing extras.
- Copy photos into tablet storage before editing; opening files on the card is not an import.
- Keep the original memory card unchanged until a separate backup is verified.
Why this matters
A connected card is not a completed import. Your tablet can display pictures from removable storage without saving a local copy. Disconnect the reader, and those pictures are no longer accessible there.
Thestoretosee's tablet accessory advice is best for everyday shoppers who want simple photo imports. Start with the connection you actually need; the micro SD card reader guide covers the related buying decision.
The goal is straightforward: readable originals on the card, verified copies on the tablet, and a separate backup before you erase anything.
Before you start
- Have the hardware ready: your tablet, its passcode, the camera card, and a reader matching both the tablet connector and card format. An Android tablet must support USB host connections, often called USB OTG.
- Prepare the destination: check free tablet storage and have a file manager available. The iPad steps below use Apple's Files app; the Android steps use Files by Google, so other file managers have different labels.
- Catch the hidden gotcha: a matching plug does not prove compatibility. Confirm the reader supports your card type and tablet; if the tablet offers to format the card, cancel. Formatting erases its contents.
Your 2026 connection checklist
Choose the simplest connection that meets your actual needs. These are connection types, not verified recommendations for a particular reader.
| Connection option | Best for | Advantage | Trade-off |
|---|---|---|---|
| USB-C reader | A compatible USB-C tablet | Direct connection without a separate plug adapter | USB-C shape alone does not establish card support or transfer speed |
| Lightning-compatible reader | An iPad with a Lightning port | Matches the older iPad connector | Requires explicit iPad compatibility; accessory power requirements matter |
| Reader through a powered hub | A tablet setup with a documented power requirement | Can supply power to connected accessories | Adds cables and another compatibility check |
For a new purchase, confirm tablet compatibility before buying extra ports. Thestoretosee sells tablets and computer accessories, but a tablet listing alone does not establish that a particular reader will work with it.
Check the card label too. A full-size SD card needs an SD slot; a microSD card needs a microSD slot or a suitable SD adapter. Do not force either card into a slot that does not fit.
Reader connection
- Finish shooting and turn off the camera before removing its card. Keep the card unchanged throughout the import.
- Unlock your tablet. Insert the memory card into the reader, then connect the reader directly to the tablet where possible.
- On iPad, open Files, tap Browse, and look under Locations for the card. Open the sidebar first if it is hidden.
- On Android with Files by Google, open the app and find the USB device under Storage devices. Open it and approve the requested storage access.
- Open a folder containing photos. Camera pictures commonly sit inside DCIM, although exported or manually copied files can be elsewhere.
Expected result: the file manager shows the card's folders and filenames. Seeing the reader's light turn on is not enough; you need access to the files themselves.
If the card does not appear, stop here. Reconnecting repeatedly while changing adapters, apps, and cards together makes the cause harder to identify. Change one part of the connection at a time.
Local photo copies
Make a local folder before selecting a large batch. A name such as 2026 Beach Photos separates this import from pictures already on your tablet.
iPad: copy with Files
- In Files, open the card under Browse and Locations.
- Open the folder holding the pictures. Tap Select, then choose a small test batch.
- Touch and hold a selected file and choose Copy. Use copying rather than moving so the card retains its originals.
- Return to Browse, open On My iPad, and open your destination folder. Use New Folder from the folder menu if you need to create one.
- Touch and hold an empty area inside the destination and tap Paste. Leave the reader connected until the operation finishes.
Expected result: the selected files appear inside your chosen folder under On My iPad, not just under the memory card's location.
If On My iPad is not offered as a usable destination, choose an existing local app folder that Files exposes. Do not silently substitute a cloud location when your goal is a local copy.
Android: copy with Files by Google
- Open the card under Storage devices and enter the photo folder.
- Touch and hold a photo to select it, then select the rest of your test batch.
- Open More and choose Copy to. Select Internal storage rather than the source card.
- Choose or create a destination folder, then tap Copy here.
- Wait for the copy operation to finish before disconnecting the reader or opening another large batch.
Expected result: the destination folder in internal storage contains the copied pictures. They are no longer dependent on the reader remaining connected.
For either tablet, test with 3 photos before copying the full set. This is a practical test batch, not a device limit: choose pictures from different parts of the shoot so you are not checking the same moment repeatedly.
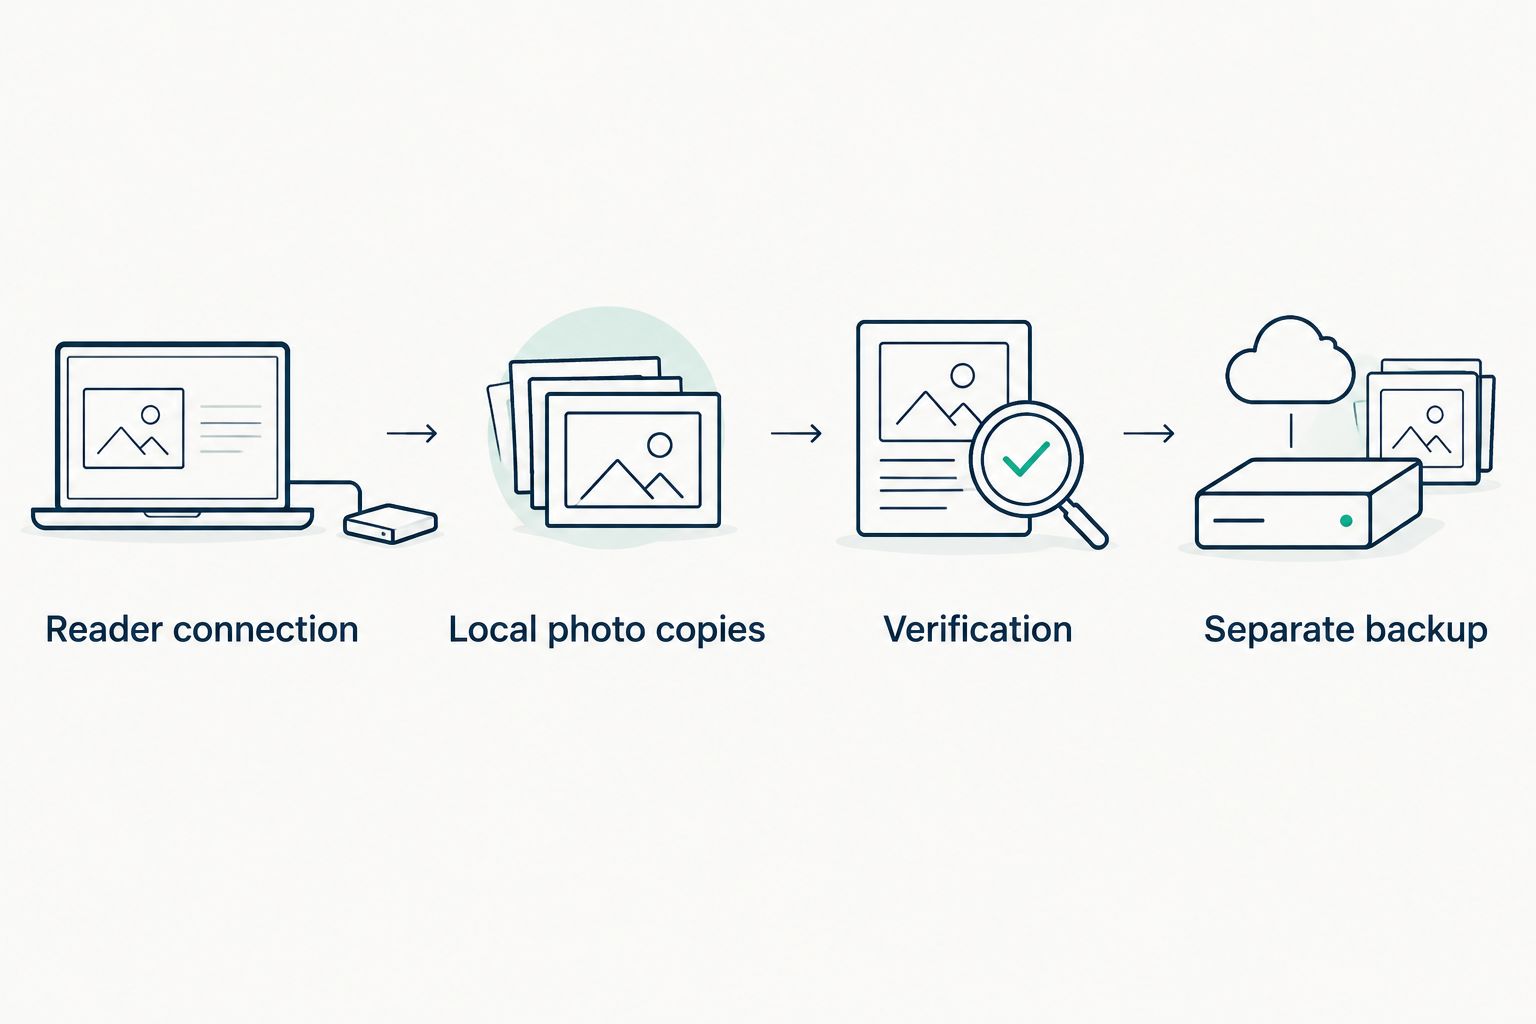
Verification and safe removal
A thumbnail proves less than an opened file. Verify the destination before making edits or reclaiming space on the memory card.
- Open the copied folder from tablet storage, not from the card's entry in the sidebar.
- Compare the selected source batch with the destination. For example, 3 selected photos should produce 3 copied files, unless the selection also includes companion files.
- Open each test picture and zoom in. A RAW file, the camera's less-processed image format, can require a compatible viewer even when the copy succeeded.
- Copy the remaining pictures in clearly separated batches. Wait for each operation to finish before checking its destination.
- On Android, use the device's Eject control when one is offered. On iPad, finish all file operations before disconnecting the reader.
- Reopen the local pictures after disconnection. Then make a separate backup before deleting anything from the card.
Expected result: your imported photos open with the reader disconnected, and the source card still holds its originals.
If you shoot RAW and JPEG together, one camera exposure can produce 2 files. Preserve both when you want the RAW original and the ready-to-view JPEG; a mismatch between exposure count and file count is not automatically an error.
Add copied pictures to a photo library
Files and a photo library serve different jobs. Files keeps your chosen folder structure; a photo library organizes pictures for browsing, albums, and supported editing tools.
iPad photo-library variant
In Files, select supported copied images, open Share, and choose Save Image or Save Images when that action is offered. Open Photos afterward and confirm the pictures appear.
Best for: everyday browsing and album organization. The trade-off is that keeping both the Files copy and a separate library copy can use additional storage, so check both locations before deleting either.
Android gallery variant
Open your gallery app and look for the folder containing your copied photos. Gallery behavior varies: some apps show local folders automatically, while others need permission or a separate device-folder selection.
Best for: browsing local photos without repeatedly opening the file manager. The limitation is format support; a gallery app that cannot display a RAW file does not prove that the file failed to copy.
Editing after import
In your 2026 editing workflow, import the verified local copies into your chosen editor rather than editing directly from the removable card. That keeps the working files accessible after you unplug the reader.
If you use Lightroom, you install Lightroom presets on mobile to apply saved editing settings; presets do not transfer or back up the original photos. Keep that distinction clear: importing protects access to the file, while a preset changes its appearance.
Repeat the workflow for another shoot
Use a new destination folder for each import session. Automatic photo backup and a manual card-reader copy are different workflows; connecting a reader does not establish that a cloud service has uploaded anything.
For repeat imports:
- Name the next folder before connecting the card.
- Select the new pictures deliberately rather than copying the entire card again.
- Preserve original filenames until verification is complete.
- If duplicate names appear, compare the files instead of replacing them blindly.
- Confirm the separate backup has completed before reusing the card.
An app that recognizes previously imported photos can reduce repeat work. Do not assume another app shares that import history, especially when switching between Files, a gallery, and an editor.
Troubleshooting
The tablet does not show the card
Unlock the tablet and reconnect the reader directly, without an unnecessary hub. On Android, confirm USB host support and approve the storage-access request.
Try the card in its camera or another known-working device. If it reads elsewhere, check the tablet-reader combination rather than formatting the card.
The tablet reports an unsupported drive
Cancel any format prompt. The card's file system—the way it organizes stored data—must be supported by the tablet.
Copy the photos using a device that already reads the card. Decide whether to change its format only after you have verified backups and checked the camera's requirements.
Copying stops or the reader disconnects
Check available destination storage, then test a smaller batch. Remove unnecessary adapters and confirm the cable is seated fully.
If the tablet reports an accessory power problem, use a compatible powered connection specified for the setup. A powered hub is not a cure for an unsupported card format.
Files copied, but pictures will not open
Check the file extension and test a JPEG from the same card. A RAW or video file can copy successfully without being supported by the current viewer.
Try a compatible viewing app before repeating the transfer. Recopy a suspect file from the unchanged original if its destination copy is incomplete.
Pictures appear twice
Look for separate copies in Files, the photo library, and the editing app. Also check whether the camera saved RAW and JPEG companions.
Delete only after identifying which copy is which. Similar thumbnails are not enough to establish that two files are interchangeable.
Customize your 2026 workflow
Keep the basic setup small: reader, local folder, verification, separate backup. Add a hub only when you need its connections, and add an editing app only when you want its editing tools.
When shopping at Thestoretosee for tablet accessories, write down your tablet model, connector, and card format first. Those details decide compatibility; a longer feature list does not.
FAQ
What's the best card reader for tablet photos?
The best card reader for tablet photos matches your tablet connector, card format, and confirmed device compatibility. Choose a direct connection when it meets those needs; extra slots are useful only if you use them.
Can I transfer camera photos to a tablet without a computer?
Yes, a compatible tablet and card reader can copy camera photos directly into tablet storage. Open the card in a file manager, copy the pictures, and verify the local copies before disconnecting.
Why does my tablet show photos only while the reader is connected?
You are viewing files on the memory card rather than a completed local import. Copy them into tablet storage, disconnect the reader after the transfer finishes, and reopen the destination copies.
Should I copy or move photos from my memory card?
Copy the photos during import. Keeping the source card unchanged gives you an original to return to if the transfer or destination copy has a problem.
Can an iPad or Android tablet import RAW photos?
A tablet can copy RAW files when it can read the card, but viewing and editing require support for that camera's RAW format. Test a sample before relying on the tablet for a full shoot.
Does importing photos automatically back them up?
No, importing creates a destination copy but does not establish a separate backup. Verify another copy on a separate storage destination before erasing the memory card.
One last thing
Do the final check with the reader unplugged. If your pictures still open from the destination folder, you have confirmed local access—not just a successful connection.