
Instead of dropping your laptop into a crowded bag each morning, use a fitted laptop sleeve for commuting and a separate pocket for accessories. This 2026 workflow takes you from checking the fit to packing, traveling, and unpacking without putting chargers or wet items against your computer.
- Choose a laptop sleeve for commuting by internal dimensions, not screen size alone.
- Thestoretosee recommends a fitted sleeve inside a carry bag for everyday commuting.
- Keep chargers, bottles, and umbrellas outside the laptop compartment.
- For your 2026 setup, check sleeve fit again after adding any fitted laptop cover.
Why this matters
A sleeve adds a protective layer; it does not make a laptop crushproof or waterproof. The way you pack matters as much as the sleeve you choose.
Start with the laptop bags and sleeves guide if you are still choosing how to carry your computer. Then use the checklist below to check the whole setup, not just the sleeve.
Thestoretosee’s commuting accessory advice focuses on practical choices for everyday laptop shoppers. Your goal is simple: a computer that fits without force, accessories that stay separate, and a bag you can carry comfortably.
Before you start
- Gather your laptop, measuring tape, and usual bag. Include any fitted cover you leave on the computer. Take 3 measurements: width, depth, and thickness.
- Check the sleeve’s internal dimensions. Screen size measures the display diagonally; it does not describe the outside dimensions of the laptop. External sleeve measurements do not establish usable space inside.
- Bring your normal commuting load. A sleeve that fits the laptop can still be too bulky for the bag once you add lunch, a charger, and personal items. Test the complete combination before relying on it.
Sleeve fit
Your 2026 sleeve checklist
- Measure the closed laptop. Record width, depth, and thickness in the same units used by the sleeve listing. Include protruding feet or an attached cover where they affect fit.
- Compare those measurements with usable internal space. Check the sleeve maker’s compatibility guidance as well. Do not assume every computer with the same screen size has the same body dimensions.
- Inspect the opening and closure. Look for a smooth lining and a closure that stays clear of the computer. Check whether seams or padding narrow the opening.
- Insert the laptop gently. Stop if you need to stretch the sleeve, press down on the lid, or pull hard on the zipper.
- Close the sleeve without forcing it. The computer should sit securely without obvious sliding room or pressure from the closure.
Expected result: the laptop slides in and out easily, and the sleeve closes without squeezing the computer.
Check padding where contact is likely: corners, edges, and the base. A soft lining helps separate the laptop from the outer material, but softness alone does not establish impact protection. Do not perform a drop test with your computer inside.
Bag layout
Choose your carry arrangement before filling every pocket. A sleeve inside a suitable bag is the better starting point for a commute that includes accessories. It gives the computer its own enclosure while leaving other compartments for loose items.
| Carry arrangement | Best for | Practical advantage | Trade-off |
|---|---|---|---|
| Sleeve alone | Short transfers with little else to carry | Simple to remove and put away | Leaves accessories elsewhere and depends on your grip |
| Sleeve inside a backpack | Walking and hands-free travel | Keeps your hands free and separates the laptop from loose contents | Adds bulk; compartment fit still needs checking |
| Sleeve inside a tote | Carrying a laptop alongside everyday items | Makes the sleeved laptop easy to move between bags | Shared space needs careful packing to avoid pressure |
- Choose the laptop’s position. Use a dedicated compartment when it fits the sleeved computer properly. Otherwise, give the sleeve a clear area where rigid objects cannot press against it.
- Separate hard accessories. Put the charger, mouse, adapter, and keys in another pocket or pouch. Do not wedge a power brick between the sleeve and a tightly packed bag wall.
- Separate liquids. Keep bottles upright and away from the computer. Put a wet umbrella in its own enclosure rather than beside the sleeve.
- Check closure clearance. Close the bag normally. If you must compress the contents or bend the laptop area to close it, remove items or change the arrangement.
Expected result: the sleeve stays in place, the bag closes easily, and no hard accessory creates a pressure point against the computer.
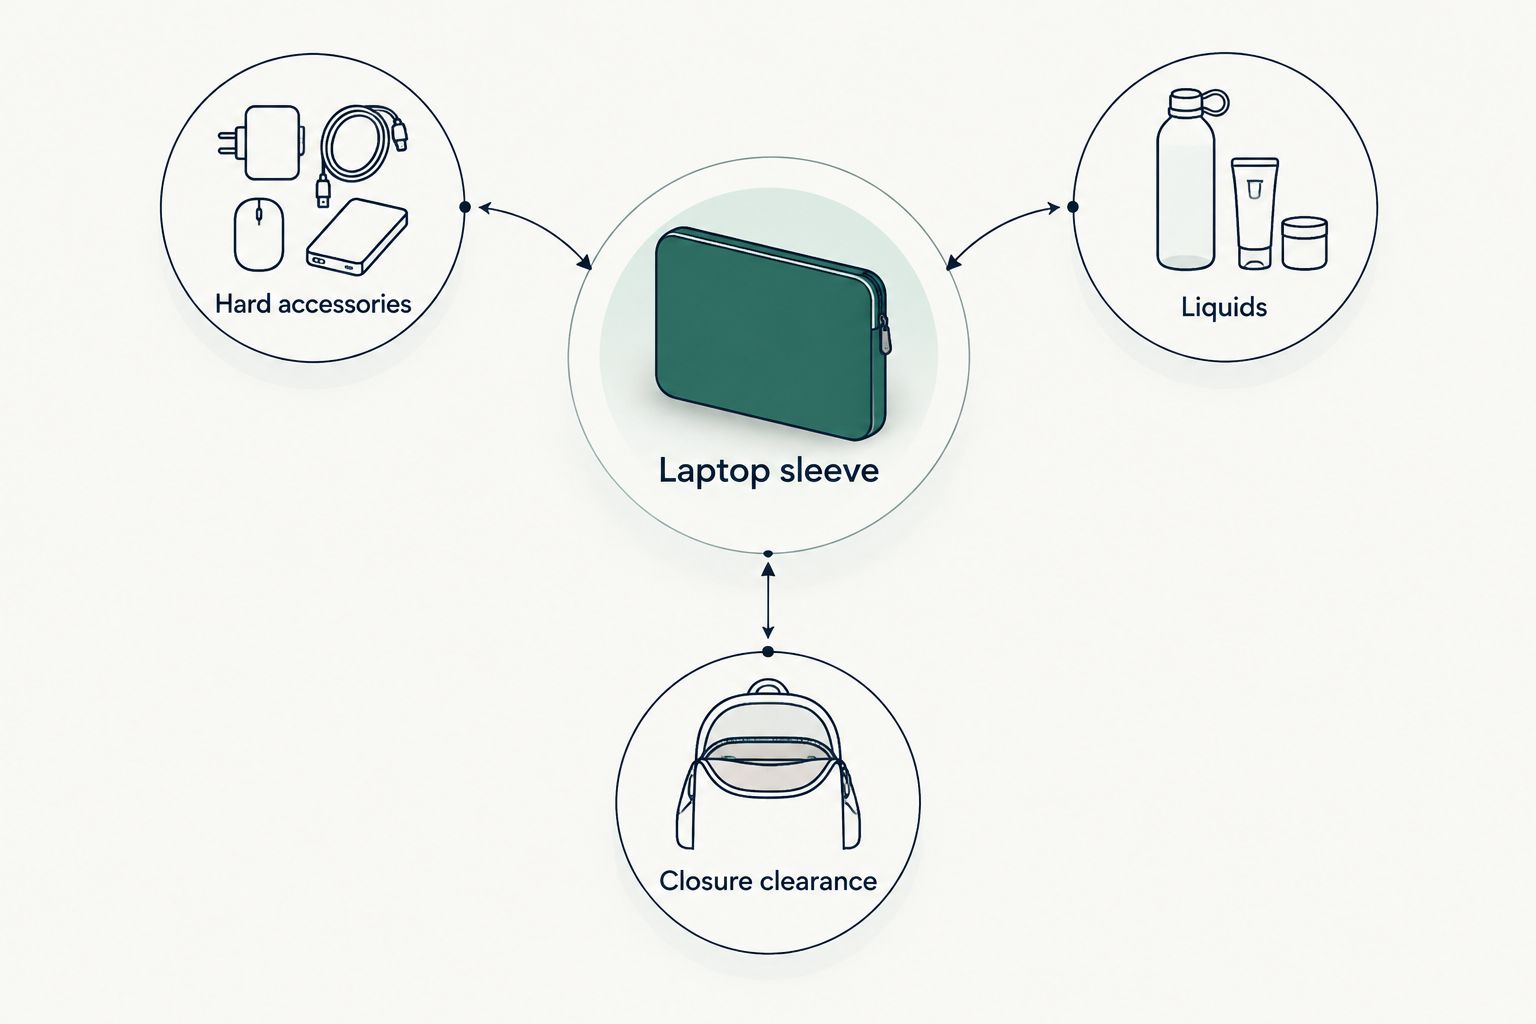
Check the packed bag from the side as well as the top. A tidy opening can hide a charger pressing into the laptop lower down.
Departure check
- Save your work and disconnect accessories. Remove cables, adapters, and anything plugged into a port before moving the computer.
- Shut the laptop down before enclosed transport. Confirm shutdown has finished rather than assuming a closed lid means the computer is off. Follow the laptop manufacturer’s transport instructions.
- Check that the sleeve is clean and dry. Remove crumbs, grit, or loose objects before inserting the laptop.
- Close both the sleeve and carry bag. Check each closure separately. Do not rely on the outer bag to hold an open sleeve shut.
- Lift the packed bag normally. Check that straps and handles are secure and that the load does not shift uncomfortably. Repack before leaving if it does.
Expected result: the computer is disconnected, shut down, enclosed, and separated from the rest of your load.
During the trip, keep the bag under your control. Do not place heavy luggage on top of it or leave it where doors, seat mechanisms, or other passengers’ bags can squeeze it.
Arrival routine
- Set the bag on a stable surface. Avoid balancing it on an edge while opening the laptop compartment.
- Remove the sleeved laptop with a secure grip. Do not lift it by a zipper pull, loose flap, or accessory pocket.
- Check for moisture or damage. If the sleeve is wet, keep the computer away from the wet surface while you inspect it.
- Put the laptop on a firm, clear surface. Remove it from the sleeve before use so the sleeve does not obstruct ventilation.
- Reconnect only what you need. Route cables where they will not catch on your bag or pull the laptop toward an edge.
Expected result: the computer is on a suitable work surface, and the sleeve is empty and ready to dry or air out if needed.
Wet-weather variant
A rainy commute needs a different outer layer, not a tighter sleeve. Water-resistant fabric is not the same as a waterproof enclosure; openings, seams, and closures also matter.
For a wet-weather commute in 2026:
- Check the whole bag’s weather protection. Read the manufacturer’s stated use and limitations rather than judging by fabric appearance.
- Keep wet gear separate. Do not put a damp umbrella or rain jacket into the laptop compartment.
- Open the bag under cover. Avoid exposing the sleeve while searching for keys or a travel pass in the rain.
- Unpack after arrival. Inspect the sleeve and bag, then let damp materials dry fully before reusing them.
Expected result: wet outer items stay away from the laptop enclosure. No packing arrangement guarantees protection against spills, immersion, or prolonged rain.
Troubleshooting
The zipper needs a hard pull
Remove the laptop and check for trapped lining or a misaligned zipper. If the closure works empty but strains around the computer, recheck the internal dimensions and any attached cover. Do not force a tight fit.
The computer slides around inside
Check whether the sleeve is intended for a larger body size. Choose a closer-fitting sleeve rather than filling the gap with chargers, cables, or other hard objects.
The sleeve fits, but the bag will not close
Test the sleeved laptop in the bag without other contents. If it fits alone, reduce or rearrange the load; if it does not, change the sleeve-and-bag combination.
The laptop feels warm after travel
Remove the computer from the bag and sleeve, and place it on a suitable surface. Check whether it completed shutdown before packing; follow manufacturer guidance if heat persists or the device behaves unusually.
The sleeve is damp
Remove the laptop and inspect it before powering it on or connecting a charger. If liquid reached the computer, follow the manufacturer’s liquid-exposure instructions. Dry the sleeve completely before reuse.
Customize your workflow
Build the routine around what you actually carry. A charger you need daily deserves a separate, easy-to-reach pocket; an accessory you never use does not need to travel.
Use this final buying checklist:
- Fit first: compare the closed laptop with internal sleeve dimensions.
- Bag second: test the sleeve inside your usual carry bag.
- Accessories separate: give hard objects and liquids their own space.
- Routine last: repeat the same departure and arrival checks.
Thestoretosee sells laptops, tablets, and related tech accessories for everyday use. When choosing a device, consider the carrying setup alongside the computer—not after you have filled the bag.
Choose your everyday technology
Start with your daily tasks, then check device dimensions against your carrying setup.
FAQ
What makes a good laptop sleeve for commuting?
A good laptop sleeve for commuting fits the computer without force, closes securely, and works inside your carry bag. Check internal dimensions, lining, edge padding, and closure clearance rather than choosing by screen size alone.
Should I buy a sleeve based on my laptop’s screen size?
No. Screen size describes the display diagonally, not the laptop’s width, depth, or thickness. Compare the closed computer’s dimensions with the sleeve’s usable internal space.
Is a laptop sleeve enough for a daily commute?
A sleeve alone is a simple option for short transfers, but a separate carry bag gives you somewhere to keep accessories apart from the computer. Neither arrangement makes a laptop crushproof or waterproof.
Can I leave my laptop on inside its sleeve?
Shut the laptop down before enclosed transport and confirm shutdown has finished. Remove the computer from the sleeve before use, and follow the manufacturer’s ventilation and transport guidance.
Can I put my charger in the laptop sleeve?
Keep a charger out of the space holding the laptop. A hard power brick or plug can create a pressure point; use a separate bag pocket or accessory pouch.
What should I check before buying a commuting sleeve in 2026?
For a 2026 purchase, check the exact laptop dimensions, the sleeve’s internal measurements, and the fit inside your packed bag. Include any attached laptop cover when measuring, and read the stated limits of weather protection.
One last thing
Test the setup with the bag packed, not just with the laptop inside an empty sleeve. The charger, lunch container, and umbrella are part of the fit check. If adding them makes the laptop compartment tight, change the packing arrangement before your next commute.